Monday, September 24, 2012

How to convert a .mdf file into a new SQL DB in MS SQL

Open your new query window in MS SQL server Management studio.

Paste this and press F5


Instructions
1 .Click your Windows "Start" button and select "All Programs." Click the "SQL Server" program group. Click "SQL Server Management Studio" from the menu list. This opens the SQL manager console where you attach your MDF file.

2 .Click the SQL Server name on the left side of the screen. This is where your MDF file restores and attaches. Click the "New Query" button to open a command prompt.

3 .Enter the following code into your SQL command console:
sp_attach_single_file_db 'new_db_name', 'mdf_file_location'

Replace "new_db_name" with the name of the new SQL database. Replace "mdf_file_location" with the physical location of the MDF file. This is the full physical path such as "C:\directory\mdf_file.MDF."

4.Press the "F5" key to execute your database statement. The MDF file is retrieved, converted and attached to the SQL Server.


sp_attach_single_file_db
'AspnetDB', 'C:\Study\mvc\App_Data\DB.mdf'

Tuesday, September 11, 2012

Create an ASP.NET Dynamic Data Website Using ADO.NET Entity Framework

This article will demonstrate how to create an ASP.NET application that uses ASP.NET Dynamic Data framework. Dynamic Data provides a scaffolding framework that enables you to create a data-driven application within minutes using either the LINQ to SQL or Entity Framework data model.
Create an ASP.NET Dynamic Data Website Using ADO.NET Entity Framework
 
This article will demonstrate how to create an ASP.NET application that uses ASP.NET Dynamic Data framework. Dynamic Data provides a scaffolding framework that enables you to create a data-driven application within minutes using either the LINQ to SQL or Entity Framework data model. Scaffolding is a mechanism that enables ASP.NET to analyze your data model and dynamically generate pages based on the data model. These generated Web pages provide full capabilities to display, insert, delete, and edit data. We will be using the Northwind database to build an application that displays pages of data.
Requirements:
I assume you have Microsoft Visual Studio 2008 with Service Pack 1 or Visual Web Developer 2008 Express Edition with Service Pack 1 installed. Without it, you will not be able to build Dynamic Data Websites.
Step 1: Open Visual Studio 2008 > Go to File menu > New Web Site. Under the installed templates, select ‘Dynamic Data Entities Web Site’. We have selected this template since we wish to use the ADO.NET Entity Framework. Enter the Name and Location of the Web site > Select the Language (C# or VB) of your choice and click OK
Templates.jpg
The structure of the application in the Solution Explorer will look similar to the following:
DynDataProjectStructure.jpg
Step 2: The next step is to add a data source to the project. I am using SQL Server 2005 Enterprise Edition. Go to your ‘Server Explorer’ > Right Click ‘Data Connections’ > Add Connection. I chose the ‘Server Name’ as (local) and ‘Database’ as ‘Northwind’. The connection appears in the ‘Solution Explorer’ as shown below:
ServerConnection.jpg
Note: If you are using SQL Express, follow these steps. Assuming you have a App_Data folder in Solution Explorer > Right-click the App_Data folder > Add Existing Item. Enter the location where you installed the Northwind database file. The path on my machine is C:\Program Files\Microsoft SQL Server\MSSQL.1\MSSQL\Data\AdventureWorks_Data.mdf
Step 3: The next step is to create a Data Model. Right-click the Project > Add ASP.NET Folder > App_Code. Right-click the App_Code folder > Add New Item. In the Visual Studio installed templates, select 'ADO.NET Entity Data Model' > Enter a name for the database model (NorthwindModel.edmx)
AddEntityModel.jpg
When you click Add, Visual Studio asks if you want to place the file in an ASP.NET_Code folder. Choose Yes. The Entity Data Model Wizard starts up as shown below:
DataModelWizard Step1.jpg
Click ‘Generate from database’ to specify that you want to generate the model from a database. The next step is to ‘Choose your DataConnection’. Select the ‘Northwind’ connection that you had created. Also remember to check the ‘Save entity connection settings in Web.config’ checkbox.
Note: SQL Express users can select Northwind_Data.mdf from the list.
DataModelWizard Step2.jpg
Click Next. In the 'Choose your Data Objects' screen, select 'Tables' to select all tables from the database. The model namespace is 'NorthwindModel' as shown below. Click Finish.
DataModelWizard Step3.jpg
Step 4: The next step is to register the data model in the Global.asax for the Dynamic Data to use. Add the following namespace <%@ Import Namespace="NorthwindModel" %> and the following line to the Global.asax:
C#
MetaModel model = new MetaModel();
model.RegisterContext(typeof(NorthwindEntities), new ContextConfiguration() { ScaffoldAllTables = true });
VB.NET
Dim model As New MetaModel()
model.RegisterContext(GetType(NorthwindEntities), New ContextConfiguration() With {.ScaffoldAllTables = True})
 
The code shown above registers the Entity Framework data context and enables scaffolding of the data model.
You can now test the application you have built. Right-click Default.aspx > View in Browser. You will see a page that displays a list of tables that you added to the data model.
DDTables.jpg
Click on a table say ‘Orders’ . A page gets displayed with the Order table details. The table contains fully functional links to edit, delete and select data. You can navigate through the records as well as add new items by clicking the Insert new item button at the bottom of the page. Check these functionality out. It's amazing to see how these pages are dynamically created with the help of a few templates.
DDTableDetails.jpg
Now if the table has a parent-child relationship with another table (in our case let us take the example of Orders and OrderDetails), then a link is provided (View Order_Details) to view details of the child table as shown below:
DDChildTables.jpg
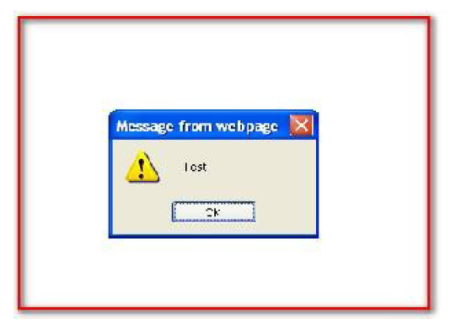
However if you click on this link (View Order_Details), a strange error appears.
DDError.jpg
The error says “A property with name 'Orders.OrderID' does not exist in metadata for entity type 'NorthwindModel.Order_Details'”
That’s a bug in the RTM release of Dynamic Data. The Dynamic Data has trouble with some data relationships in Entity Framework data models. More info about it can be found over here.
Fix to the Bug: The fix to this bug was provided by scothu. The fix is to replace the default Entity Framework Data Model provider with a new data model provider.  You can download the fix (DynamicDataEntityFrameworkWorkaround.zip ) from here.
Step 5: Once you have downloaded the .zip file, extract it. Then right-click Website > Add ASP.NET Folder > Bin > Right-click Bin > Browse to Microsoft.Web.DynamicData.EFProvider.dll and add it to the Bin folder. Now for the fix to work, we need to make some changes in the Entity Framework Model in Global.asax.
Now replace this line:
model.RegisterContext(typeof(NorthwindEntities), new ContextConfiguration() { ScaffoldAllTables = true });
with this line
C#
model.RegisterContext(new Microsoft.Web.DynamicData.EFDataModelProvider(typeof(NorthwindEntities)),
            new ContextConfiguration() { ScaffoldAllTables = true });
VB.NET
model.RegisterContext(New Microsoft.Web.DynamicData.EFDataModelProvider(GetType(NorthwindEntities)), New ContextConfiguration() With {.ScaffoldAllTables = True})
We also need to change the GetDisplayString () in the ForeignKey.ascx and add a try-catch block to it. Open the DynamicData\FieldTemplates\ForeignKey.ascx.cs or vb and replace the GetDisplayString method shown below:
C#
    protected string GetDisplayString() {
        return FormatFieldValue(ForeignKeyColumn.ParentTable.GetDisplayString(FieldValue));
    }
VB.NET
      Protected Function GetDisplayString() As String
            Return FormatFieldValue(ForeignKeyColumn.ParentTable.GetDisplayString(FieldValue))
      End Function
with this method shown below to add the try-catch block. Note we are returning the ForeignKeyColumn.ParentTable.DisplayName in the catch block when an exception is thrown
C#
    protected string GetDisplayString()
    {
        try
        {
            return FormatFieldValue(ForeignKeyColumn.ParentTable.GetDisplayString(FieldValue));
        }
        catch (Exception)
        {
            return ForeignKeyColumn.ParentTable.DisplayName;
        }
    }
VB.NET
      Protected Function GetDisplayString() As String
            Try
                  Return FormatFieldValue(ForeignKeyColumn.ParentTable.GetDisplayString(FieldValue))
            Catch e1 As Exception
                  Return ForeignKeyColumn.ParentTable.DisplayName
            End Try
      End Function
Now build and preview the Default.aspx again. Click the Orders table and then click on View Order_Details link. You will now be able to view the OrderDetails for that Order.
DDOrderDetails.jpg
In this article, we explored how to effortlessly create a fully functional ASP.NET Dynamic Data Web site without writing much code. In the forthcoming articles, we will explore how to extend the default behavior of Dynamic Data. Stay Tuned! I hope you liked my article and I thank you for viewing it.

Refrences:

http://www.codeproject.com/Articles/377291/An-Introduction-to-ASP-NET-Dynamic-Data-from-a-Beg
 

Thursday, July 26, 2012

SQL Source Control

Friday, July 13, 2012

Create a mobile website with jQuery Mobile

Tuesday, June 12, 2012

Code Analysis Tool (CAT.NET)

CAT.Net is a binary source code analysis tool that helps in identifying common security flaws in managed code. These vulnerabilities are listed in the below table.

 
Vulnerability
Description


Cross Site Scripting(XSS)
XSS vulnerability allows an attacker to inject a malicious HTML Code or Scripts which gets executed in the Client's browser.
A successful
XSS can lead to modification in application, DOS attack, loss of user data, and execution of malicious command on the web server.


SQL Injection
SQL injection is a technique to exploit application using malicious code passed to Sql server for execution. A successful Sql injection attack results in unauthorized access to database. In some cases the whole system gets compromised
Process Command Injection
If user input is use to create a process in your application e.g. user provides that an argument to the new process, then it is vulnerable to process command execution. In this attack the attacker tries to execute system level commands.

File Canonicalization
Canonicalization is the process of converting data to its canonical form. File paths and URLs are particularly prone to canonicalization issues and many well-known exploits are a direct result of canonicalization bugs.
If user input is used to construct a path or name a resource then your application is vulnerable to file canonicalization

Exception Information
Exception handling is built in mechanism in .Net Framework to handle the errors that occurred at run time. Proper exception/error mechanism should be in place to avoid information disclosure through error message. The information may contain Database, Web server, application path, Source file details etc. which an attacker can misuse to launch an attack.

LDAP Injection
LDAP injection is a technique to exploit application using malicious code that constructs the LDAP query for execution.  The technique is similar to SQL Injection attack.


XPATH Injection
XPATH injection is a technique to exploit application using code that constructs the XPATH query for XML data. A successful XPATH injection can lead to the whole xml data file.

Redirection to User Controlled Site
When an application allows redirection via user supplied parameters in the destination URL like "http://samplewebsite.com/login.aspx?ReturnUrl=Statementview.aspx". If these kinds of url are not validated for allowed destination, an attacker can simply send a malicious URL like "http://samplewebsite.com/login.aspx?ReturnUrl=http://phishingsiteurl" to redirect user to a phishing page.


CAT.Net tool enhances the quality of the source and helps in adopting security best practices.
Microsoft uses this tool for security review. One thing we should always keep in my while using automated code analysis tool is the false positive results.Cat.net sometimes produces the false positive results.

CAT.Net tool must be used during the implementation phase of security development lifecycle (SDL).


There are some limitations when using the CAT.Net i.e. on the size of the dll being analyzed. 18 MB dll is to be analyzed by cat.net. Above this size it throws an exception "Out of memory". The exception will be thrown only on 32 bit not on 64 bit machines.

The CAT.NET tool can be used in four different scenarios:
1.  A snap-in to the Visual Studio IDE,
2.  A command line tool,
3.  As an FxCop rule and
4.  Integrated into VSTF TeamBuild as an MSBuild custom task.
Here in this demo I will be using command line tool.

Ø  Open command prompt and navigate to folder where CATNetCmd64.exe is located.
Ø  Type the command "CATNetCmd64.exe /file:"catnet.dll" where /file accept the assembly name to be analyzed.
Ø  Once done with this you will see the analysis has started and on successful completion it will generate a report. The screen after successful completion of the analysis.


You can view report which is generated in the root path of the ct.net directory named as report.html.

Sample report for the above analysis is shown below.


Download

32 bit- http://www.microsoft.com/downloads/en/details.aspx?FamilyID=0178E2EF-9DA8-445E-9348-C93F24CC9F9D   

64 bit- http://www.microsoft.com/downloads/details.aspx?FamilyId=e0052bba-2d50-4214-b65b-37e5ef44f146
Code Analysis Tool (CAT.NET) is a binary source code analysis tool that helps in identifying common security flaws in managed code. These vulnerabilities are listed in the below table.

AntiXSS Module

In the earlier post we learnt about the AntiXSS Library. Which was very usefull for us to stop any Crosssite scripting attack XSS.
But we cannot mannually go in every field of the project and check it with Antixss Library.
Also it might happen that Some new developer comes in and forgets to encode the new fields he introduced with the Anti XSS Library. Microsoft has also come up with a solution where we can do it Globally.

Introduction

SRE protects applications from Cross-Site Scripting (XSS) attacks by leveraging the Anti-XSS library to encode data. It works by inspecting each control that is being reflected by ASP.NET and then automatically encodes data of vulnerable controls in their appropriate context. Data to be encoded for a specific control is mentioned in the antixssmodule.config file. This is useful for applications which are already deployed in production and when we don't want to rewrite code.

SRE Configuration for Web Applications

  • To download the SRE MSI file, use this link: http://www.microsoft.com/download/en/details.aspx?displaylang=en&id=325.
  • Install SRE and use these DLLs installed (while installation, setup will ask whether to install SRE or AntiXss module or both): AntiXSSLibrary.dll and AntiXssModule.dll.
  • The DLLs will be present in the path (default path): C:\Program Files\Microsoft Information Security\Microsoft Anti-Cross Site Scripting Library v3.1\Security Runtime Engine\Module.
  • Add reference to both DLLs to the web application project, i.e., RxOfficeLegal.
  • Add the below configuration element into the Web config file under the httpmodules section.
  • After adding the above patch, use ConfigGen.exe to generate the config file for the controls.
  • The most important point is, if ConfigGen.exe is not generating the configuration for the controls then use manual configuration for the controls that are are needed with the respective properties (e.g. for Label control, Text property should be configured). Generally the name of the configuration file is antixssmodule.config. (By default the standard antixssmodule.config is generated with the EncodingControls.xml file).
  • Rebuild the solution and see the result on the page rendered.
  • For GridView, and data source controls, we have to manually encode in the code. For GridView, it is mandatory to have the Rowdatabound event present in the .cs file, it is OK even if it is empty.

How SRE Works

SRE works using Reflection, it takes controls from the antimodule.config file and encodes the controls according to the encoding type. There are mainly the following types of encoding in AntiXssModule:
  • GetsafeHtmlMathod
  • HtmlAttributeEncode
  • HtmlEncode
  • JavaScriptEncode
  • UrlEncode
  • GetSafeHtmlFragment(String)
The above encoding types have overloaded methods. Three overloaded methods are listed below:
Example:
  • GetSafeHtmlFragment(String)
  • GetSafeHtml( TextReader sourceReader,Stream destinationStream)
  • GetSafeHtml( TextReader sourceReader,TextWriter destinationWriter)
Note: For manual encoding, we have to add the namespace refernce: "using Microsoft.Security.Application".

AntiXssModule Configuration File and Deployment

The AntiXssModule configuration file contains the following attributes. These attributes are useful to configure the application according to your requirement. The attributes and their description are given below.

<ControlEncodingContexts>

This section lists the controls and encoding contexts supported by SRE. Example:

<ControlEncodingContexts> 
<ControlEncodingContext FullClassName="System.Web.UI.WebControls.Label" PropertyName="Text" 
EncodingContext="Html" /> 
<ControlEncodingContext FullClassName="System.Web.UI.WebControls.HyperLink" PropertyName="Text" 
EncodingContext="Html" /> 
</ControlEncodingContexts>

PropertyName

The name of the property which needs to be encoded.

EncodingContext

The type of encoding which needs to be applied. Valid attribute values are Html, HtmlAttribute.

ControlEncodingContext

This node defines a control and its encoding context. Multiple nodes may exist for different controls; the same class name and property name must not exist twice. With each control, the full class name, property name, and encoding context must be defined. Other attributes are ignored.

<DoubleEncodingFilter Enabled="True" />

This section can be used to configure double encoding support.

<EncodeDerivedControls Enabled="True" />

This section can be used to configure encoding for derived controls.

<MarkAntiXssOutput Enabled="False" Color="Blue"/>

This section can be used to configure color coding of the output.

<Suppressions><Exclude Path="/Page_1.aspx" />

This section includes the configuration for suppressing SRE for the listed files and folders.

Deployment

Follow these steps to deploy the SRE:
  • Use the ConfigGen.exe utility to create an antixssmodule.config file. Alternatively, you copy the default antixssmodule.config from the Security Runtime Engine\Module folder to your web application's root folder.
  • Copy the DLLs from the Security Runtime Engine\Module folder to your web application's \bin folder.
  • Enable the SRE module by modifying your web.config file according to these examples. In IIS 6.0 and IIS 7.0 in Classic .NET Application Pool:
  • <system.web> 
    <httpModules> 
    <add name="AntiXssModule" type="Microsoft.Security.Application.SecurityRuntimeEngine.AntiXssModule"/>
    </httpModules> 
    </system.web>
    In IIS 7.0 pipeline mode:
    <system.webServer> 
    <modules> 
    <add name="AntiXssModule" type="Microsoft.Security.Application.SecurityRuntimeEngine.AntiXssModule"/> 
    </modules> 
    </system.webServer>
    After deployment, if we want to check which part is encoded, use the following setting:
    MarkAntiXssOutput Enabled="True"
    For example: http://www.foosite.com/default.aspx?MarkAntiXSSOutput=true.

Limitations

  1. For GridView and other datasource controls, we have to manually add code for encoding.
  2. SRE ConfigGen not picking up child controls inside DataGrid or DataList: SRE ConfigGen identifies controls that need to be encoded by reflecting controls in the web application binary. Due to the limitations of its implementation, ConfigGen cannot reflect what controls are present in an <ItemTemplate>. You can work around this by manually adding the control detail in antixssmodule.config, or by using the default configuration file from <Installation Folder>\SRE\Module.
  3. SRE encodes data on the server side. That means any ASP.NET control which is configured in the AntiXssModule.config file and which has the runat="server" attribute set can be encoded by SRE.

SRE Success Screenshots

Some testing screenshots of SRE Module testing with Anti-Xss library:
If we use SRE module with the XSS library and set the Label control Text property with malicious content, then it will not execute the malicious content, it will encode the malicious content and prevent its execution.

Example 1

If the text of the Label is populated with a script tag which is not expected as a value of the label as below:
<asp:Label ID="lblUser" CssClass="LastLogin" runat="server" Text="<script>alert('Test')</script>"></asp:Label>
then it will encode the above label on the screen as shown:
<script>alert('Test')</script>
but if the SRE module with XSS library is not used, then it will execute malicious content, which might be harmful to the application. For example:

Example 2

If we try to inject malicious content using an input control in the UI as below:
<script>test</script>
If SRE is used, then it will redirect to an error page:
A potentially dangerous Request.Form value was detected from the client 
(ctl00$mainContentPlaceHolder$txtAddress2="<script>alert('Testi...").
If we don't use the SRE tool, it will show an alert message due to the malicious content executed. If we set the MarkAntiXssOutput tag in the SRE config file antixssmodule.config, then you can see which part (controls) in the page are encoded with a specific color. For example, set in config:
<MarkAntiXssOutput Enabled="true" Color="Yellow"/>
and pass MarkAntiXssOutput=true in request URL: http://testpage.aspx?MarkAntiXssOutput=true, then output will be colorful in yellow color.

Other findings

The SRE tool does not encode child controls, for which we have to manually change the code to encode. Like GridView, DataGrid, and other controls. For that we need to add a Rowbound event prototype in the code. For example:
protected void GridView_RowDataBound(object sender, GridViewRowEventArgs e) 
{ 
}

References

Anti XSS Library Stopping XSS Attacks

Using AntiXss as the default encoder for ASP.NET
 See: http://antixss.codeplex.com/

ASP.NET 4 includes a new extensibility point which allows you to replace the default encoding logic with your own anywhere ASP.NET does encoding.
All it requires is to write a class which derives from System.Web.Util.HttpEncoder and register that class in Web.config via the encoderType attribute of the httpRuntime element.

Walkthrough

In the following section, I’ll walk you through setting this up. First, you’re going to need to download the AntiXSS library which is at version 3.1 at the time of this writing.

On my machine, that dropped the AntiXSSLibrary.dll file at the following location: C:\Program Files (x86)\Microsoft Information Security\Microsoft Anti-Cross Site Scripting Library v3.1\Library

Create a new ASP.NET MVC application (note, this works for *any* ASP.NET application).

Copy the assembly into the project directory somewhere where you’ll be able to find it. I typically have a “lib” folder or a “Dependencies” folder for this purpose. Right clicke on the References node of the project to add a reference to the assembly.

add-reference Add-Reference-dialog

The next step is to write a class that derives from HttpEncoder. Note that in the following listing, some methods were excluded which are included in the project.
using System;
using System.IO;
using System.Web.Util;
using Microsoft.Security.Application;

/// <summary>
/// Summary description for AntiXss
/// </summary>
public class AntiXssEncoder : HttpEncoder
{
  public AntiXssEncoder() { }

  protected override void HtmlEncode(string value, TextWriter output)
  {
    output.Write(AntiXss.HtmlEncode(value));
  }

  protected override void HtmlAttributeEncode(string value, TextWriter output)
  {
    output.Write(AntiXss.HtmlAttributeEncode(value));
  }

  protected override void HtmlDecode(string value, TextWriter output)
  {
      base.HtmlDecode(value, output);
  }

  // Some code omitted but included in the sample
}
Finally, register the type in web.config.
...
  <system.web>
    <httpRuntime encoderType="AntiXssEncoder, AssemblyName"/>
...
Note that you’ll need to replace AssemblyName with the actual name of your assembly. Also, in the sample included with this blog post, AntiXssEncoder is not in any namespace. If you put your encoder in a namespace, you’ll need to make sure to provide the fully qualified type name.
To prove that this is working, run the project in the debugger and set a breakpoint in the encoding method.

debugger-breakpoint
With that, you are all set to take full control over how strings are encoded in your application.